Showing posts with label Craftwork Cards. Show all posts
Saturday, 18 April 2015
Hobby House Wedding Couple
This is a card I have made for a friend's wedding. I have used a 7x7 pearl card blank for the base and added a craft card layer. On top of this is have used papers from First Edition pad 'Isabelle'. All the layers on the card have had the edges distressed with Tea Dye Distress Ink. Across the middle of the card I have added 2 layers of Duchess Lace from Creative Expressions. The main topper is from the Hobby House Sylvia Zet collection - 'Love Me Do'. I have cut the image out using Spellbinders dies Labels Two and also created a matt with the same dies. There are 2 panels behind the topper and these have been created using more papers from the First Edition pad and cut with Scalloped Labels One. They have been matted onto Decorative Labels One shapes cut from craft card. At the top and bottom of the card I have edged the paper with a gorgeous cream woven style ribbon. The flowers and pearl pins were from my stash; I have picked colours from the main image and built it all up from there. The little sentiment is from Craftwork Cards and the foliage has been created using Tattered Lace dies. Again, a box is needed for this one!
Sunday, 21 September 2014
Posted Penguins!
These two little chaps are from the Hobby Art Penguins Christmas stamp set. I was inspired by one of their gallery posts and decided to make my own take on it. The card to the right has been made using the penguin stamped on Neenah Card and coloured using Promarkers with Tumbled Glass Distress Ink in the background. The papers are from the Craftwork Cards Christmas Post collection along with the flower and sentiments used. To create the opening I have taken a circle die, placed it on my chosen section and cut from the middle to the outside several times. I then cut halfway down each of the torn segments and then folded them back. The coloured image was attached behind the created aperture. I have used Glossy Accents on the stamp and some ribbon from my stash.
This is a slightly simpler version, same stamp and papers, this time also using an embossed sentiment from the penguin set. I have also coloured the back of the torn section here, as it looks more like brown paper this way. I love the look in his eyes!
Tuesday, 17 December 2013
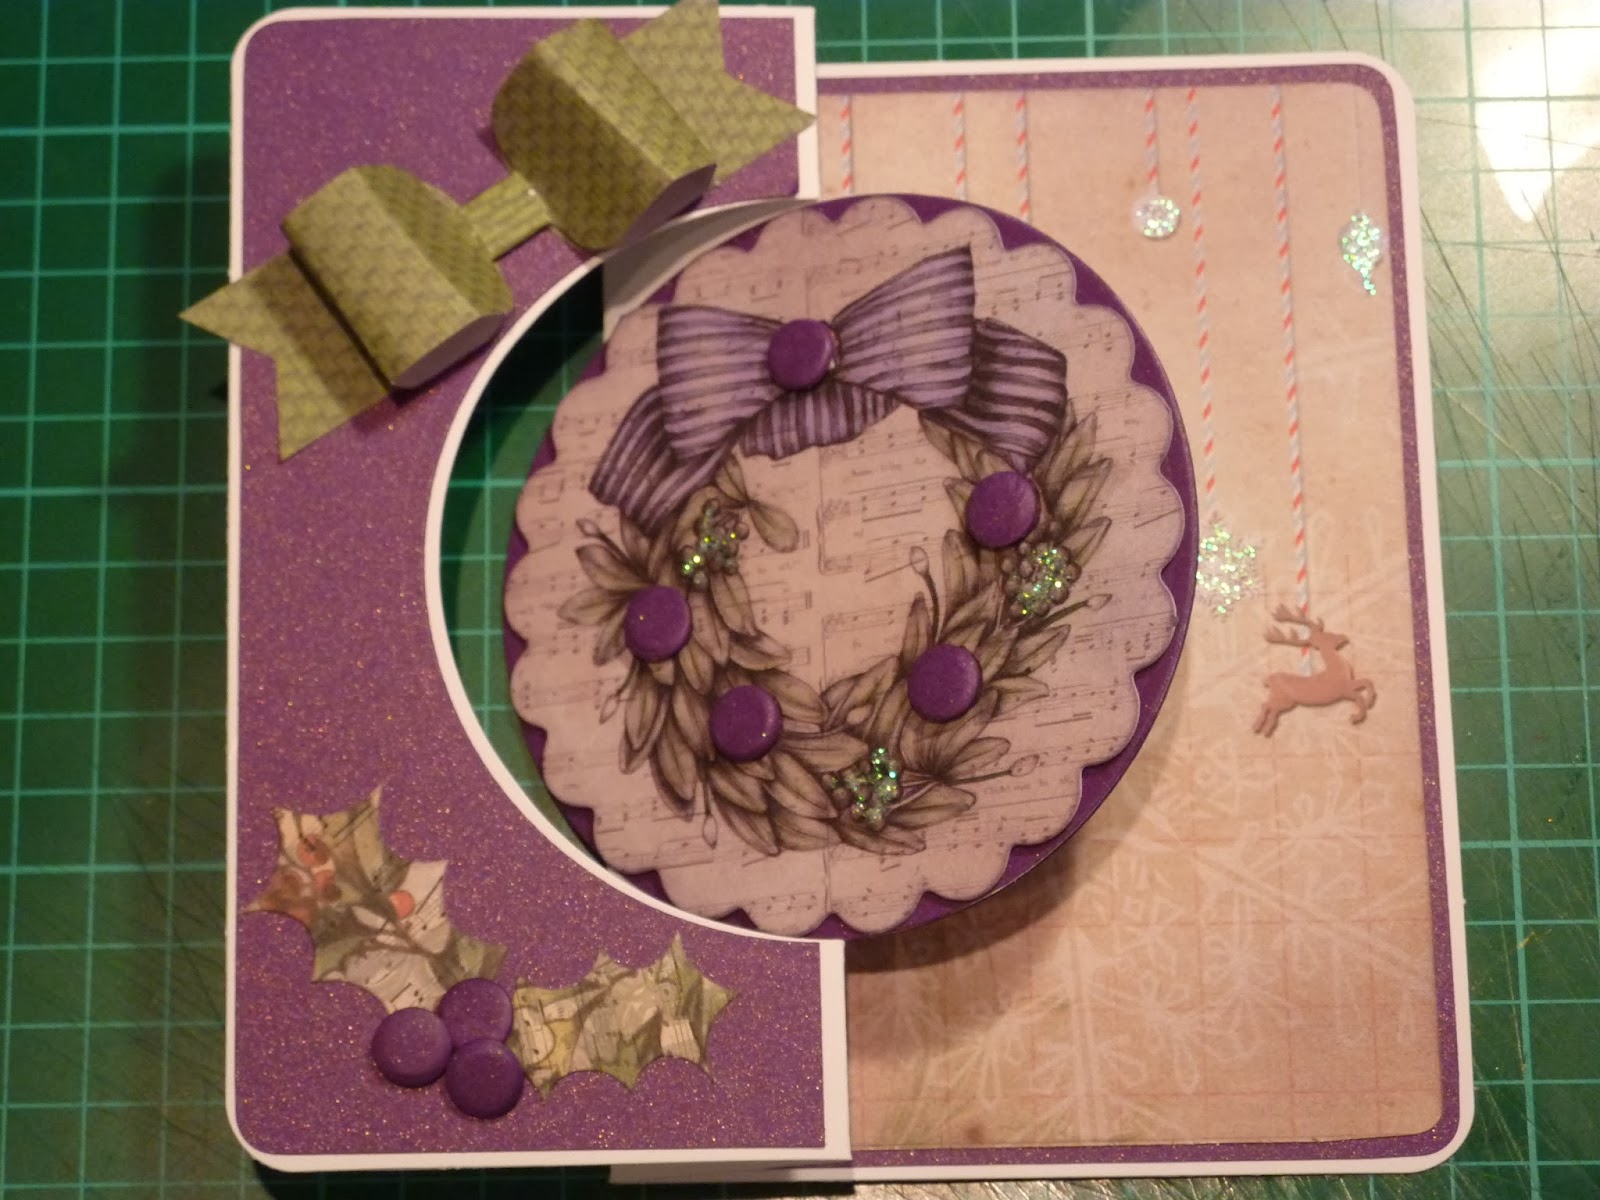
Paper Bows Wreath Card
Still creating Christmas cards! This was made at a craft class with Lisa Baker. The basic card is a new size from Craftwork Cards and is 7x7" square. The papers are all from the Christmas Post range from the same company, as are the paper bows and the topper. The paper bows pad has loads of bows in different sizes all in coordinating papers, so mixing them up is easy! The card was made cutting a basic circle shape from the middle of the card creating an aperture. The same size circle was then cut from red coordination card and then embossed with a Christmas style folder. The holly leaves were also cut from the same type of card and the red berries are Card Candi with Signo pen highlights.
Tuesday, 10 December 2013
Wreath Swing Cards
Here are some swing cards made using Craftwork Cards Christmas Post papers, bows and some toppers from one of their pads. Card Cardi has been used to highlight the berries and pick up the card background colour. Small highlights with glitter Stickles have also been used to add interest. All the mat and layer shapes have been cut with Spellbinders Dies.


Tuesday, 12 November 2013
I've Been Good All Year!
With this card and the slight variation, I wanted to make use of the fantastic IndigoBlu words that I just had to get. I love the font and the cheeky message here, it allows so many options! The background paper is the Craftwork Cards Christmas Post papers again, (are you seeing a trend here...!) which have also been distressed with vintage photo ink. I have used a paper bow from the same kit and also a strip of paper for the middle detail. The fantastic sleigh and tiny holly leaves have been cut using my Cricut and the new December 25th cartridge. The middle circle has been cut with a Standard Circle Large Spellbinder die through decorative paper covered with double sided adhesive. Once cut I then covered with Micro Beads. This gives a great tactile effect which I am getting very fond of at the moment. The decorative circle behind has been cut with Spellbinders Delightful Circles die, and the label shape is a Labels Eight die. The bottom variation has the addition of some Glossy Accents on the stamp image and little of the famous Card Candi!
Tuesday, 5 November 2013
My Favourite Card Made For Christmas!
Monday, 21 October 2013
Christmas Post
The two cards below are made using the same collection and accessories, again with similar colour tones. I have also used red perfect pearls for the flower centres and found some cream and gold ribbon to add an extra touch. The card on the right was inspired by a card I made at a class this time last year with Lisa Baker, this time adapted for use with the Christmas Post collection. The card has been cut apart with some Hunkydory Snowfall acetate added and then reconstructed again. As Lisa's blog challenge is 'Traditional Christmas' I will enter these for this month...
Thursday, 19 September 2013
Card Candi Flowers
I recently saw some Card Candi stamps that I thought were really simple but effective, so I thought I just had to give them a go! I also just happened to have acquired (!) a few Embossalicious folders which I thought might frame the main image nicely. I like these Crafter's Companion Diesire folders, they are the perfect size for my Big Shot and my usual 6x6 card size! This folder called 'Elegant Frame' gives a great feature to focus the eye. Both these cards are both made using the one of the Woodware Bubble Bloom Card Candi stamps, which also come with the sentiment I have used here. I have stamped them both twice, the second time just cutting out the leaves to coordinate with the main colour I chose. I have tried to go tone in tone with all the embellishments as well, as I thought the main image would look a bit busy otherwise! The ink has been added just to highlight the folders (Tumbled Glass Distress Ink). The card below also utilises one of the Spellbinders D'lites dies to accent the sentiment.
Subscribe to:
Posts (Atom)