Saturday 2 December 2017

Christmas Houses


Hello all!

Christmas is fast approaching...I am SO not organised! To be honest I have been busy making things for other people and not for myself; I always seem to think I have loads more time than I actually do!
Here is an MDF piece I was pleased with, made for a recent Imagination Craft's Hochanda show. It started life as plain MDF before being transformed!
The MDF was basecoated with white Gesso before I applied random thicknesses of Crackle Paste to add texture. Once dry I also stencilled a few bricks to some sections with the same paste to add another layer of interest. I used a wash of Chestnut Starlight Paint to age the houses and give some shading, making it darker or lighter as appropriate. The branches and birds are greyboard Magi-Cutz painted with Starlights and the rest are odd bits from my stash! Voila!


I think I may need to make another one for myself now!
xx

Saturday 25 November 2017

Mixed Media Fun - Starlights and Rice Paper Galore with Imagination Crafts!

Hello crafty friends!

Here's another post for fans of Imagination Craft's products, showing how I used some of their latest releases in the November mixed media show aired on Hochanda this month. I had great fun mixing up themes for the show, using a mix of Crackle Paste, canvases, MDF, paints and stencils! My desk was every colour under the sun and some very weird combinations of products I can tell you! Hey ho, that's how you experiment I suppose...

Here is a canvas that I made using some of the MDF houses as embellishments, along with greyboard flowers and a host of other things!
The flowers in the background have been created with some Imagination Craft's stencils and different colours of chalk paint. The chalk paint was used so that there would be a contrast between the beautiful Starlight Paint background and it would not all get lost in amongst each other. The houses have been painted with chalk paint and then stencilled onto. The bricks were created with another stencil and some Crackle Paste to add texture. Once the paste was dry I went over the bricks with a wash of Chestnut Starlights to make the cracks 'pop'. The stars and starburst on the house were stencilled with Starlights. To create a shadow behind the words they were stencilled twice - the second time around moving it slightly before applying Blackcurrant Sparkle Medium (my FAVOURITE!!)


Along with the canvas, I also created a decorated MDF Clock. My version did not have a mechanism in it, (although you can use these) it was purely for decorative purposes.


The 'clock face' is part of one of the gorgeous Rice Paper designs featured in the show and the embellishments, butterflies and leaves were from the packs of greyboard shapes (Magi-Cutz/Art-Cutz). I also used parts of the Rice Paper to decorate the edge and base of the clock, tying it all together by using Starlight Paint in tones of colours taken from the Rice Paper images. The flowers were from my stash, but I edged the petals in the same paint colours to make them shine and coordinate with the whole piece.


Thanks for reading and I will see you soon!


Saturday 18 November 2017

Imagination Craft's Rice Paper and Upcycled Glass

Hello there!

This is a post for all you Imagination Craft's fans, featuring some of the samples I made for the latest Hochanda show this month. The show focussed on mixed media and Rice Papers (until they rapidly sold out that is!!). My first set of samples looked at the use of the Rice Papers onto glass, with a touch of Starlight Paint to add some shimmer. This technique is great for upcycling old pieces of plain glass, or even random ornaments, (I raided the charity shop) but is also great if you like buying plain bits of cheap glass (think pound shop) and then making them into beautiful gifts.


My basic technique was to choose a main colour and then a Rice Paper design that would accentuate that (or the other way around if preferred!).  I used a wet paintbrush to moisten areas of the Rice Paper that I wanted to feature and then very gently tore around these areas to release them. Applying decoupage glue to inside of the glass item and the back of the Rice Paper, I placed into position. Once all the areas had been decorated I then gave a final glue coat all over to seal. To add colour inside and behind the Rice Paper (making it pop) I painted with Starlight Paint.


Where it was very tricky to paint inside an item (small pots) I  applied a coat of decoupage glue to the glass to create a 'key' and then covered with my choice of Starlight Paint afterwards. I attached the Rice Paper on top of this.

Once I started to play with glass and all the different ways to apply decoration, there was no limit! I applied Crackle Paste, Alchemy Wax, painted inside and out and attached embellishments to my heart's content!
Thanks for reading - see you soon!

Saturday 7 October 2017

Paint Fusion Fushias - An Altered Stickles Rack


Hello crafty friends!

A journey into a 'brave new world' for me today, by request of my daughter! I received some of Sheena's amazing Paint Fusion Stamps as a present, but I have been a little scared of doing much with them...
Ages ago Adele bought a Clevercut rack to hold loads of Stickles, but apart from being assembled, it remained in its bare state staring at me. I was just going to paint it plainly to get it done, but Adele decided she wanted me to use some Paint Fusion flowers on it (no pressure then!!)

Anyway, here are my first efforts, not perfect at all, but I am working on it! I really need to get the hang of the veins, but I think I need a smaller brush for that. The good thing is that the back panel is screwed to the wall anyway and you can't really see the sides once it's up! I know it's there though and Adele was happy with my efforts, so that's all that matters.


Thank you for looking!
P.S. the front section had no room for flowers - only the Stickles with the distressed paint look in between!
xx 

Thursday 28 September 2017

An Embossed Sparkly Wreath Card

Good morning ladies and gents! I nearly October...oh my gosh!! I have the last of my Christmas Wreath makes over on the Lisa B. Designs Blog today, it is a very simple card to do, so please pop over to the blog to find out more!

Love
Martina
xx

Thursday 21 September 2017

A Beaded Wreath Card

Good morning all! This week over on the Lisa B. Designs Blog I have a tutorial showing how I made the card below using the Nellie Snellen Christmas Wreath Stamp with beads. This is my favourite card I made with the stamps! Please pop over to the blog for a 'how to' guide!


Love 
Martina
xxx

Thursday 14 September 2017

A Christmas Wreath Card, or 4?

Good morning all!

The Autumn chill is in the air for the school runs, but the sun is shining, so it's all good! I have a card over on the Lisa B. Designs Blog today, using the Nellie Snellen Wreath Stamp. If you would like to see more detail on how it was made, please pop over!


Love
Martina
xxxx
P.S. If anyone is going to the Ally Pally show on Saturday - I will see you  there!!

Thursday 7 September 2017

A Christmas Wreath Card with a Sepia Twist

Good morning all! It feels like Autumn here, even though I know it is technically not yet! With Christmas fast approaching, it was time to start some card making in the Lisa B. Designs classes, so this month I am working with a Nellie Snellen Wreath Stamp. If you would like to see how the card below came about, please visit me over on Lisa's Blog!


Love
Martina
xxx

Thursday 31 August 2017

There are Always Flowers...

Good morning crafty people!

It's nearly the end of the holidays and I am relieved! Trying to please 4 children from 13 years old to a 1 year old has been very testing. Combine this with a limited budget and limited use of a car...holiday, anyone? Adults only though please!

Anyway, I have the card below over on the Lisa B. Designs Blog today, please pop over a take a look if you would like to see how it came together (mistakes and all!)

Much love,
Martina
xx

Thursday 24 August 2017

A Card-io Jigsaw Card

Hi crafters! I have another Card-io card for you today, this time building on the aperture scene card I made last week.  If you would like to know more, please join me over on the Lisa B. Design's Blog!


Love
Martina
xxx

Thursday 17 August 2017

Card-io Stamps used to Create a Mini-Scene Card

Good morning all! I have been dabbling with my Card-io stamps again over on the Lisa B. Design's Blog today, please join me and pop-over to see a step-by-step for the card below!


Lots of love,
Martina
xxx

Thursday 10 August 2017

Card-io Stamps: Bugs and Wild Flowers!

Good morning crafty peeps!

I have a post using some Card-io Stamps over on the Lisa B. Designs blog today, please pop over and take a look if you would like to see a step-by-step for the card below.

Love
Martina
xx

Tuesday 8 August 2017

Ribbon Storage - Vintage Style!


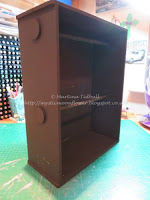
Hello all! I am still organising and this time it is the turn of my ribbon stash (or at least some of it!) This unit is again from Stamps Away (Clevercut), and is available in different configurations. This one is a double loose ribbon rack. I have also purchased a 'Reel Wheel', but have not decorated this yet!

As usual, the unit came flat-packed and was very easy to put together. As before, I used decorators' filler to fill the joins in the MDF, sanded it back where needed and made the edges even and smooth.
The next step was to paint the entire unit with black gesso and let dry. I then drew on one of Andy Skinner's brilliant techniques using hair clay: I added some to the areas I wanted to be able to expose later on (the clay will stop the top layer of paint I use from sticking down).

With the clay in place, I then painted the entire unit again, this time with DecoArt Chalky Finish Paint in Lace. I also painstaking painted each of the ribbon holders with the same colour (this was the worst bit!)


Now to decorate! I used the border from PaperArtsy Stencil PA050 across some of the edges to tie them all in, some of the wording from PS049 and the 'Paris France' logo from a Creative Expressions Stencil. I used Relic DecoArt Chalky Finish for the stencilling, as this gave a nice dark, but not black, effect.


With the stencil detail in place, I was then able to experiment with some of the gorgeous 7 Gypsies 'Inspire' Parchment Rub-ons. I cut out lots of the sewing themed images and text and then randomly applied them all over the unit. 


Once I started applying the images, I realised that there was going to be quite a few areas that would be peeled away, so I took a cloth and then rubbed all over the unit until the areas with wax underneath were exposed. I then finished adding some more rub-ons and also stamped a few sewing themed images with Archival Ink.


There we have it, one finished ribbon storage holder! I am really pleased with it, even though I know most of the decoration won't be seen, I know it's there!
Thanks for reading,
Martina
xxx


Thursday 3 August 2017

Crafter's Companion Foil Transfers and Rice Paper - Quick and Easy!


Good day crafty folk! I have a quick and easy make over on the Lisa B. Designs Blog today, please pop by and see how easy it is to make the card below!


Love
Martina
xxx

Wednesday 2 August 2017

Rare Oddities - Graphic 45 Papers to make an Ink Storage Solution


Good evening crafters! As promised, I am back with another crafty storage make for my 'organised' craft room.
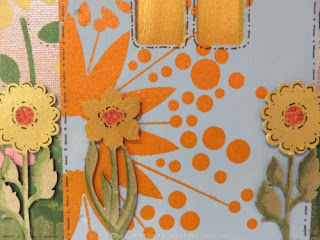
This unit is designed by Stamps Away (or 'Clevercut) and is meant for small square inks (Versacolor etc). The unit comes flat-packed and is easily assembled with strong PVA glue to secure. Once dry I always fill the 'joins' with decorators' filler and sand the excess off ( I like the surfaces to be smooth). With a perfect base created, I painted the whole unit using DecoArt Chalky Finish Paint in Remembrance. This does take a while, but only one coat is needed, as the DecoArt Paint is fabulous to use.


To smarten up the trays (yes I know the inks will hide most of it!) I added some Imagination Craft's Starlight Wax to 'distress' it and then used lots of little Lavinia and Cardio Stamps in each of the cavities. The final touch was a light spray with gold Crafter's Companion Sparkle and Shine.


I also added some wax to the edges of the unit and the inside.


I did not want to make the outside of the unit too 3D, but it was a perfect excuse to use some of my gorgeous Graphic 45 Rare Oddities Papers! (that way I can always look at them and also not give them away!) I finished the edges with some purple braid from my stash.


Here is the finished unit! All ready to go and in use already.
Thank you for reading,
Love
Martina
xxx


Thursday 27 July 2017

An Imagination Craft's Rice Paper Decoupage Card

Hello all! I have the project below over on the Lisa B. Designs Blog today, please pop by to see a step-by-step guide! I have used Rice Papers, Crafter's Companion Foil, PaperArtsy Infusions, Art Stamps, Starlights, and a PaperArtsy JOFY stencil. 


See you soon,
Love,
Martina
xxx

Powered By Blogger