Showing posts with label Imagination Crafts Starlights. Show all posts

Saturday, 2 December 2017

Christmas Houses


Hello all!

Christmas is fast approaching...I am SO not organised! To be honest I have been busy making things for other people and not for myself; I always seem to think I have loads more time than I actually do!
Here is an MDF piece I was pleased with, made for a recent Imagination Craft's Hochanda show. It started life as plain MDF before being transformed!
The MDF was basecoated with white Gesso before I applied random thicknesses of Crackle Paste to add texture. Once dry I also stencilled a few bricks to some sections with the same paste to add another layer of interest. I used a wash of Chestnut Starlight Paint to age the houses and give some shading, making it darker or lighter as appropriate. The branches and birds are greyboard Magi-Cutz painted with Starlights and the rest are odd bits from my stash! Voila!


I think I may need to make another one for myself now!
xx

Saturday, 25 November 2017

Mixed Media Fun - Starlights and Rice Paper Galore with Imagination Crafts!

Hello crafty friends!

Here's another post for fans of Imagination Craft's products, showing how I used some of their latest releases in the November mixed media show aired on Hochanda this month. I had great fun mixing up themes for the show, using a mix of Crackle Paste, canvases, MDF, paints and stencils! My desk was every colour under the sun and some very weird combinations of products I can tell you! Hey ho, that's how you experiment I suppose...

Here is a canvas that I made using some of the MDF houses as embellishments, along with greyboard flowers and a host of other things!
The flowers in the background have been created with some Imagination Craft's stencils and different colours of chalk paint. The chalk paint was used so that there would be a contrast between the beautiful Starlight Paint background and it would not all get lost in amongst each other. The houses have been painted with chalk paint and then stencilled onto. The bricks were created with another stencil and some Crackle Paste to add texture. Once the paste was dry I went over the bricks with a wash of Chestnut Starlights to make the cracks 'pop'. The stars and starburst on the house were stencilled with Starlights. To create a shadow behind the words they were stencilled twice - the second time around moving it slightly before applying Blackcurrant Sparkle Medium (my FAVOURITE!!)


Along with the canvas, I also created a decorated MDF Clock. My version did not have a mechanism in it, (although you can use these) it was purely for decorative purposes.


The 'clock face' is part of one of the gorgeous Rice Paper designs featured in the show and the embellishments, butterflies and leaves were from the packs of greyboard shapes (Magi-Cutz/Art-Cutz). I also used parts of the Rice Paper to decorate the edge and base of the clock, tying it all together by using Starlight Paint in tones of colours taken from the Rice Paper images. The flowers were from my stash, but I edged the petals in the same paint colours to make them shine and coordinate with the whole piece.


Thanks for reading and I will see you soon!


Saturday, 18 November 2017

Imagination Craft's Rice Paper and Upcycled Glass

Hello there!

This is a post for all you Imagination Craft's fans, featuring some of the samples I made for the latest Hochanda show this month. The show focussed on mixed media and Rice Papers (until they rapidly sold out that is!!). My first set of samples looked at the use of the Rice Papers onto glass, with a touch of Starlight Paint to add some shimmer. This technique is great for upcycling old pieces of plain glass, or even random ornaments, (I raided the charity shop) but is also great if you like buying plain bits of cheap glass (think pound shop) and then making them into beautiful gifts.


My basic technique was to choose a main colour and then a Rice Paper design that would accentuate that (or the other way around if preferred!).  I used a wet paintbrush to moisten areas of the Rice Paper that I wanted to feature and then very gently tore around these areas to release them. Applying decoupage glue to inside of the glass item and the back of the Rice Paper, I placed into position. Once all the areas had been decorated I then gave a final glue coat all over to seal. To add colour inside and behind the Rice Paper (making it pop) I painted with Starlight Paint.


Where it was very tricky to paint inside an item (small pots) I  applied a coat of decoupage glue to the glass to create a 'key' and then covered with my choice of Starlight Paint afterwards. I attached the Rice Paper on top of this.

Once I started to play with glass and all the different ways to apply decoration, there was no limit! I applied Crackle Paste, Alchemy Wax, painted inside and out and attached embellishments to my heart's content!
Thanks for reading - see you soon!

Tuesday, 2 May 2017

Altered Clock - Vintage and Pretty

Good Morning All!

I am delighted to have a post on the Imagination Craft's Blog today explaining how I created the altered art clock below from plain MDF to the finished article. The clock was shown on the latest Hochanda One Day Special along with some of my other makes!


I hope you like it!

Martina
xx

Tuesday, 21 March 2017

Imagination Crafts - Textured Journal Cover


Good afternoon all! I have a 'how-to' post on the Imagination Craft's Blog today, showing a step-by-step guide for the journal cover above (shown during the recent TV launch). Please pop along and see what you think!

Love
Martina
xxx

Wednesday, 22 February 2017

Starlight Waxes and Paints for Superhero Men's Makes!

Hello all!

Today I wanted to share with you two recent makes, one for my husband and one for the Imagination Craft's Starlight Waxes launch show on Hochanda. Both are in the same vein and are designed for boys (and men...!)

My first make was a pencil pot for my husband's work desk. He wanted something fun and different, so I decided to go for a vintage superhero comic theme!
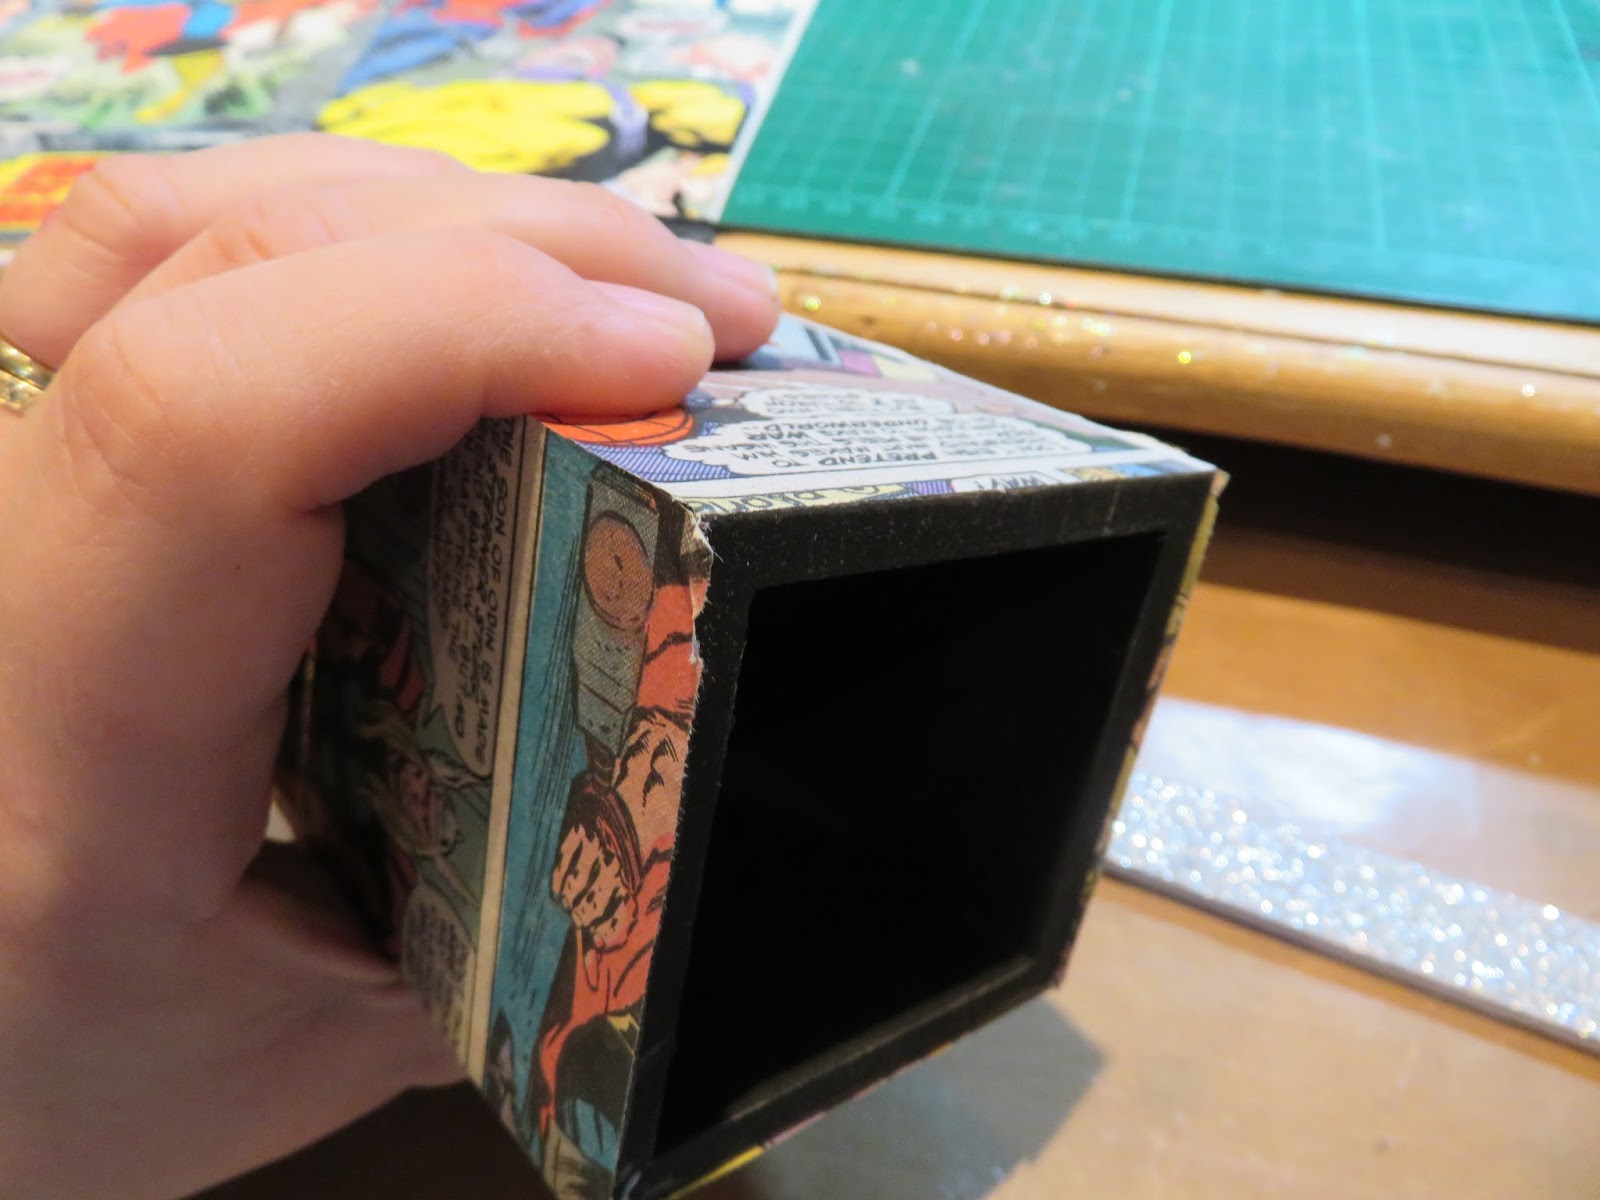
Using Black Starlight Paint, I coated the edges and inside of an MDF pencil pot.


To find my 'backing papers', I visited a local charity shop and bought some vintage comics that were older than me! Flicking through them, I chose some images and page sections that I liked and wanted to make into a main feature.


I covered each side of the pencil pot, cutting the paper slightly larger than needed. Once the glue was dry, I used a nail file to file away the excess paper and give a neat edge.


To add some words to my design and make them stand out, I backed them onto some black card and created a border for each one.


As I was putting the pencil pot together, I decided I wanted to add some further dimension. I had some blank cabochons in my stash that I had bought in a bargain bin ages ago, so I had a play with these... Using a small round die, I cut out four different superhero heads to fit inside them. To make a dome effect and seal the design, I heated some clear embossing powder and poured onto each cabochon ( I also managed to burn my finger at this point!)


Once I added all the elements together, I tidied up the edges that had been filed with some Starlight Black Wax. I also added some to the sides in streaks to dull the papers and make it look a little darker and 'used'.


So, what do you think? My husband was pleased anyway!

My next make was in the same style, but this time using one of the Imagination Craft's MDF crates, designed for a boy's bedroom.
The crate was painted all over with Black Starlight Paint and then some White Gold Starlight Wax streaked across the sides. I also added the wax to some Chicken Wire Art-Cutz and snipped pieces out randomly to add to the sides. I cut some words from the same comics I used before, again backing them with black card. I did not use any characters this time, as I was not sure if I was allowed to on the TV!


My boys were pleased with this one, so the men in the house got a crafty 'look in' with my makes this time!
Thank you for reading, see you again very soon,
Love
Martina
xx


Tuesday, 14 February 2017

Imagination Crafts Starlight Waxes: A Garden Plaque

Good morning all!
I have a tutorial over on the Imagination Crafts Blog today, explaining step-by-step how I have made the plaque below. I have used the stunning new Starlight Waxes along with other products, bringing together the old and the new for a Springtime make!


Thank you for visiting!

Thursday, 12 January 2017

Starlights on Fabric - A Present for Me!!!

I decided to transform a boring old pen wallet into something more to my taste using Imagination Crafts Starlights Paints this week. Here is a little snippet...


To see the full post on the Lisa B. Designs Blog, click HERE!

See you soon!


Thursday, 5 January 2017

Thursday, 29 December 2016

Thursday, 22 December 2016

Sparkly Santa is on his Way!

A post using Imagination Crafts Starlights Paints and Sparkle Medium from me today, over on the Lisa B. Design's Blog. Here's a quick peek of one of the steps ...Click HERE to see the full 'how-to'!


Thursday, 15 December 2016

Christmas Sparkle and Starlight...


A focus on the simple and sparkly from me today, over on the Lisa B. Design's Blog. Here is a peak at one of the stages; click HERE to see the completed card and full step-by-step!


Thursday, 8 December 2016

MDF Art and Sparkle!

Vellum, flowers, beads, sparkle and all on MDF! Click HERE to see my post this week over on the Lisa B. Designs Blog! Here is a sneak peek...


Thursday, 1 December 2016

A Christmas Plaque with some Furry Friends!

I have made a word plaque this week over on the Lisa B. Design's Blog, using Imagination Crafts products and Hobby Art characters. Here is a sneak peek, but click HERE to see the full post and 'how-to'!


Thursday, 24 November 2016

Poles Apart but Best Friends!

A very cold feel to the card from me this week over on the Lisa B. Designs Blog. I have played with the gorgeous Hobby Art Poles Apart characters...here is a sneak peek, click HERE to see the complete post and finished card!


Thursday, 17 November 2016

Let it Snow!

Some cute and cuddly Hobby Art friends from me this week over on the Lisa B. Designs Blog! Click HERE to see the full post, but here's a sneak peek...


Thursday, 3 November 2016

Acetate used with Starlight Paints

This week over on the Lisa B. Design's Blog I am using Imagination Craft's Art Stamps on acetate and adding some Starlights Paint for a touch of sparkle. Click HERE to read the full post and see the finished card. Here is a sneak peek...


Thursday, 20 October 2016

Art Stamps used for a Vintage Christmas Card

A trip down memory lane for me this week, all inspired from some old sheet music! Here is a sneak peek - click HERE to see the full card and 'how-to' on the Lisa B. Design's Blog.


Thursday, 13 October 2016

Art Stamps, Santa and Starlights

With a focus on Starlight Paints from Imagination Crafts, join me over on the Lisa B. Design's Blog this week to see a card using the new Art Stamps. Here's a sneak peak...


Powered By Blogger