Hello all! I have recently decided to organise, de-clutter and re-design my craftroom of late, so I thought I would do a few experiments along the way! Now I warn you perfection-mad, symmetrical, pansies all in a row, matching-type people out there, that by experiments I mean 'decorating things all differently' and totally to MY TASTE! Oh dear I hear my friends sigh...
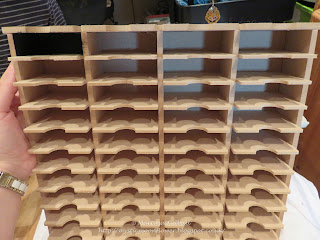
So, my first project - an MDF Distress Ink Storage Rack by Stamps Away/Clevercut (they have made some amazing storage solutions of late, so you may see a few popping up here and there!!) For this project I was inspired by Andy Skinner's techniques (what a legend!) and one of the gorgeous stencils by PaperArtsy. I wanted to create a vintage rack, which may have been used in a gardening capacity at one time, but is now a bit worse for wear. See what you think...(all comments/feedback/criticism and suggestions are very welcome!).
Step one: follow the instructions to turn your pile of MDF into the rack itself, making sure you don't groan at all the fiddly painting that you know is coming!
Next, I painted the entire rack with a coat of Relic Americana Décor Chalk Paint and let this completely dry. I then used patches of DecoArt Weathered Wood Medium all over the unit, including some on the ink storage sections. I did not want it all to be weathered, just parts that I thought would have been, if it had been stored and a bit battered! (please excuse the lighting in my photo below, I tend to craft very late at night, but you can see the patches of Weathered Wood at least!)
Once the medium was dry (I left it to dry naturally) I was ready for my top paint layer. I used Americana Décor Chalky Finish Paint in Lace, covering each section quickly and with one stroke of my brush. If I missed a bit, I tried to leave it alone, as messing with the paint once the Weathered Wood Medium has started to do its work creates a horrid lumpy disaster! In the pictures below you can see the cracks appearing...love it!


Now that all the preparation work was done, it was time for the fun bit: decoration! Whilst having a look around one of favourite craft shops, (That's Crafty!, in Essex) I found two beautiful PaperArtsy stencils that were perfect for this piece (named 049 and 050). Both stencils have some fantastic decoration elements on them, which are usable for any projects and not just upcyling or gardening themes! Using some more Relic paint, I lightly stippled through the stencils, trying not to be too perfect. For the large Dahlias, I added a pale wash of some pink paint from my stash, just to give a touch of faded colour.

My next stage was to add a wash of DecoArt Fluid Acrylics in Transparent Yellow Iron Oxide over the areas to be the 'most worn' . To darken this still, I added some Quinacridone Gold.
There we have it, my finished rack! Not perfect, I need some practise I know, but it will do for my purpose! I suppose most of it will be hidden anyway, but I know what's on it at least...
One problem...now I am collecting the Oxides, I am going to need another one! Damn!
That's it for now, thank you for reading!
Love
Martina
xxx


